Posted by Armin on Tuesday, May 31, 2011

It's common knowledge that MacBooks and iMacs can be controlled with any Apple remote. This feature is turned on by default, so unless people manually disable remotes, or pair a specific remote to their computer, they are easy victims for a simple prank. You can control the volume, start/pause songs in iTunes, advance and go back a song in the library, and, most annoyingly, enter FrontRow by pressing the appropriate button on the remote. Of course, it would be nice not to actually have to approach the "prankee" with a conspicuous Apple remote. It would be far nicer to have a microcontroller mimic the IR codes and control everything remotely…
The Apple remote uses a standard infrared protocol (see http://www.instructables.com/id/Control-Arduino-with-IR-Apple-Remote for example), that can be easily implemented with an Arduino, a resistor and an IR LED. Now you could just tell the Arduino to randomly "press" buttons from time to time. Since I had a bunch of X-Bees lying around, I thought it would be neat to use them to trigger the IR transmitter remotely. The RF communication between two XBees is strong enough to be able to sit two or more rooms away from the "victim".
Materials needed:- A computer with a serial port terminal program such as CoolTerm
- Arduino
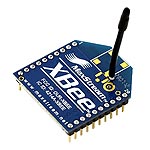
- 2 X-Bees
- An X-Bee explorer (or another Arduino that can be adapted to serve as an explorer)
- an IR LED
- a resistor (anything between 50-150 Ohms ought to work)
There are plenty of online suppliers that stock any of these items, for example Sparkfun or AdaFruit. The X-Bees I ordered directly from Digi's online store for about $19 each.
If you don't have any X-Bees, you could just leave out the RF step and talk to the Arduino-remote by plugging the Arduino into the USB port and establishing a serial connection.
The circuit
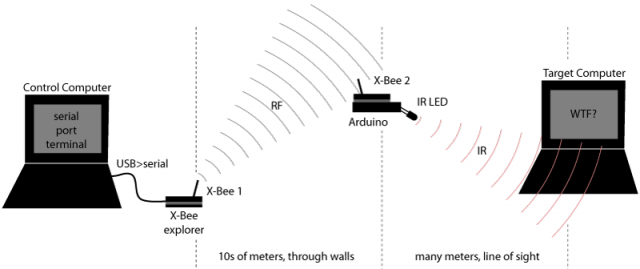
Hooking everything up is simple, if you have all the components at hand. You need two X-Bees, one configured as a controller, the other one as a router, running on the same network. (There are many resources on how to configure X-Bees, for example at http://www.ladyada.net/make/xbee/configure.html ).
One of the X-Bees is connected to the RX/TX pins of the Arduino, so any serial commands sent to the XBee can be read and parsed by the code running on the Arduino. The other X-Bee is connected to the host computer's serial port to relay serial commands wirelessly to the Arduino.
The Arduino is powered by a 9V battery, which unfortunately only lasts about 4 - 5 hours. (Energy-saving optimizations could be done, but, hey, this is a quick prank.) If the hiding place allows it, it would be much better to use an AC adapter.
On the computer from which the Arduino is controlled you need to install a serial port terminal program. I personally like CoolTerm (freeware from http://freeware.the-meiers.org/ ). Once an serial connection between the control computer and the X-Bee is established, you can type the commands that elicit the IR codes into the terminal. "p" for play/pause, "u", for "volume up", "d" for "volume down", etc. You can see (and reassign) the commands in the Arduino source code found below.
The disguise
If left out in the open, the gadget would surely look suspicious. Therefore, a good hiding place needs to be found. In this case, the Arduino was taped into a large ring binder, with an opening for the IR LED. The LED had a fairly narrow focus, so it needed to be pointed (+/- 40 degrees) towards the target computer.
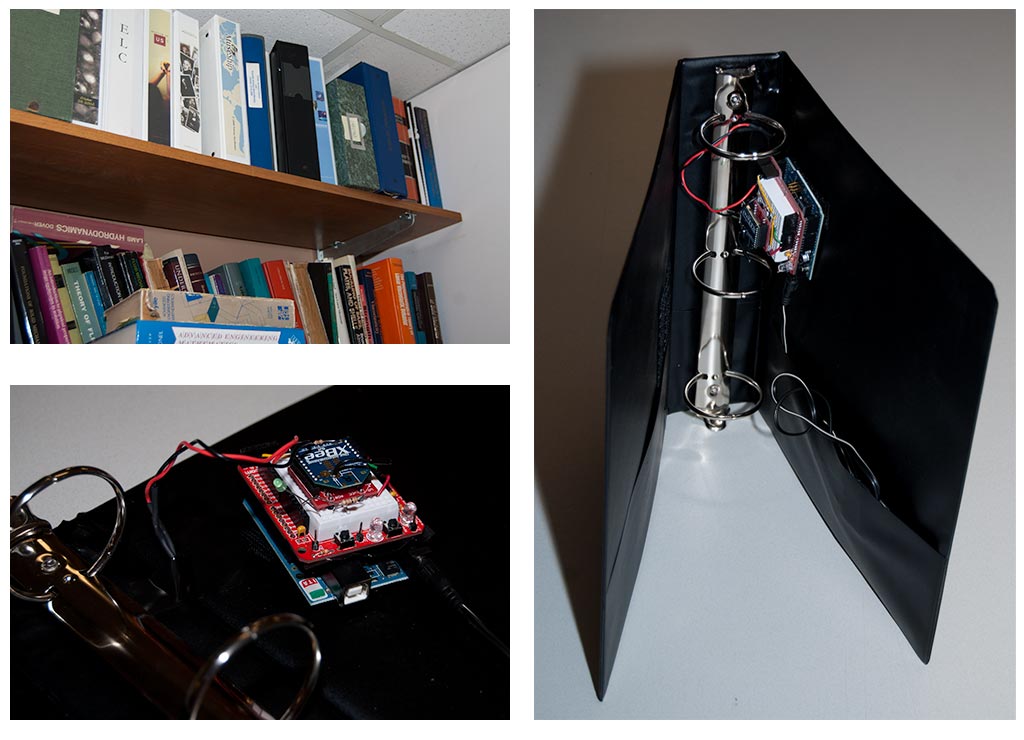
When placed in a bookshelf, the IR LED is nearly invisible. Of course, the disguise has to be adapted to the environment it is to be deployed in.
Arduino Code listing
- IR library: http://www.arcfn.com/2009/08/multi-protocol-infrared-remote-library.html
- Apple remote codes from: http://www.instructables.com/id/Control-Arduino-with-IR-Apple-Remote